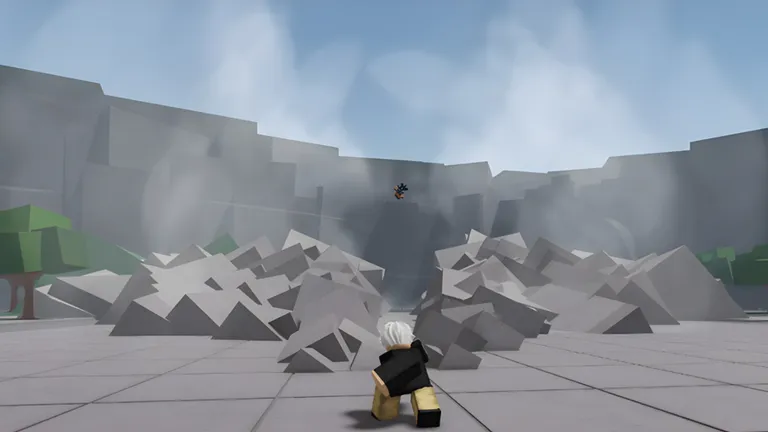
- Slayer 2 Final Selection is the survival trial that transforms a human into a full Demon Slayer.
- Prep matters most: bring a learned Breathing Style, healing items, and level-appropriate gear before entering.
- Survive the timer: demons spawn continuously inside the exam arena; mobility skills outvalue raw damage.
- Choose your path: passing Final Selection locks you onto the Slayer track; becoming a Demon is a separate route.
- Top pick: Thunder or Water Breathing gives the easiest clears for most players.
What Is Final Selection in Slayer 2?
Final Selection is the signature rite of passage in Slayer 2 (Project Slayers 2), the Roblox Demon Slayer RPG from Ouw0pp's studio. It mirrors the anime's Fujikasane trial: you enter a demon-infested mountain arena and must survive a set period against waves of hostile demons. Passing the exam officially graduates you from a nameless trainee into a Demon Slayer, unlocking progression toward advanced breathing trainers, higher-tier quests, and the late-game boss zones.
Before you queue up, understand the three pillars of the trial:
Survival Trial
- Timed endurance against demon waves
- No safe zones inside the arena
- Exit early = fail and retry
Skill Check
- Tests your Breathing Style mastery
- Stamina and blocking are essential
- Dash cancels save runs
Progression Gate
- Unlocks Slayer rank progression
- Opens advanced trainer quests
- Gateway to boss farming routes
Do not attempt Final Selection on a fresh character. Enter only after learning your first Breathing Style, stocking healing items, and confirming your M1 combo, block (F), and dash (Q) muscle memory. Under-leveled players are the most common failure case.
The exam is also a fork in the road. Slayer 2 offers two progression tracks: the human Slayer path gated by Final Selection, and the Demon path built around Blood Demon Arts and health regeneration with a sunlight weakness. If your goal is BDA skills like String or Temari arts, you skip the exam entirely and follow the Demon route instead.
Preparation: Level, Breathing Style, and Gear
Your clear rate is decided before you ever step into the arena. The table below ranks the confirmed Breathing Styles by how well they perform in Final Selection conditions — tight spaces, constant waves, and stamina pressure.
| Breathing Style | Arena Rating | Why It Works | Best Moves |
|---|---|---|---|
| Thunder | ★★★★★ | Burst dash combos delete demons fast, unmatched mobility | Thunderclap and Flash, Sixfold |
| Water | ★★★★☆ | Reliable dash attacks and strong finishers, forgiving for beginners | Water Surface Slash, Constant Flux |
| Wind | ★★★☆☆ | Wide area coverage handles demon groups, slower wind-ups | Dust Whirlwind Cutter, Idaten Typhoon |
| Mist | ★★★☆☆ | Repositioning tech avoids damage, low raw output | Obscuring Clouds, Eight-Layered Mist |
| Insect | ★★☆☆☆ | Poison damage-over-time is slow in a timed trial | Butterfly Dance: Caprice |
Learn your style from its trainer NPC near the starting village (Kiribating) — each requires a minimum level and a Wen fee. For most players, Thunder or Water is the recommended loadout going in.
Your gear and consumables checklist:
| Item Category | What to Bring | Notes |
|---|---|---|
| Weapon | Standard Katana (Stinger for Insect) | Fully equipped and assigned to hotbar |
| Healing | Restocked healing items from village shops | Buy more than you think you need |
| Boosts | XP or stat boosts from redeemable codes | Redeem codes before entering |
| Stats | Points in health and stamina | Exhausted players cannot block or dash |
Rare and above clans (roughly 10% of rolls) provide damage multipliers or stamina efficiency that meaningfully ease the trial. If you have spare spins from codes, re-rolling away a Common clan before the exam is a smart use of them — just do not burn every spin chasing a Mythical Kamado roll early.
Final Selection Walkthrough: Step-by-Step
Follow this sequence to go from fresh spawn to Slayer rank without wasted hours.
Level Through the Starting Village
Accept every quest from the NPCs around Kiribating before farming. Low-level bandit and starter demons respawn quickly, and quest rewards stack on top of kill XP — this is the fastest leveling in the early game.
Learn Your First Breathing Style
Find your chosen trainer, complete their quest, and pay the Wen fee. Practice the full moveset on overworld enemies until every skill is muscle memory; the arena is not the place to learn combos.
Gear Up and Redeem Codes
Visit village shops to stockpile healing items, confirm your katana is equipped, and redeem any active codes for spins or boosts. Codes are case-sensitive and expire fast, so redeem them as soon as they drop.
Enter and Survive the Trial
Inside the arena, keep moving. Use dash (Q) to escape demon swarms, block (F) to blunt heavy hits, and only commit to combos when a demon is isolated. Watch your stamina — an exhausted character cannot defend at all.
Claim Slayer Rank and Progress
After surviving the timer, you graduate as a Demon Slayer. This opens advanced trainer quests, mid-level zones like Zapiwara Mountain, and the world boss farming loop that funds your late-game build.
Your next milestones are Zapiwara Mountain for mid-tier leveling and the Butterfly Mansion for story progression quests. From there, move into the high-level demon territory and dungeon entrances once your full moveset is unlocked.
Combat Tactics Inside the Arena
Final Selection demons reward patience over aggression. These tactics separate clears from wipes:
- Kite, don't tank. Circle the arena edges and pull small groups rather than fighting in the center where waves converge.
- Burst and reset. With Thunder, use Thunderclap and Flash to delete one demon, then dash out before the swarm reacts.
- Manage stamina ruthlessly. Never drop below the threshold needed for one dash and one block — that reserve is your escape button.
- Use arena spacing. Obstacles break demon pathing; fight near them so you always have an escape angle.
- Heal on cooldown discipline. Top up at half health, not at critical, so a sudden swarm cannot burst you down.
| Situation | Correct Response | Mistake to Avoid |
|---|---|---|
| Swarmed by 3+ demons | Dash out, reset spacing | Trading M1 hits in the middle |
| Low stamina | Disengage and recover | Committing to another combo |
| Low health | Heal behind an obstacle | Healing in open ground |
| Isolated demon | Full combo burst | Overextending past 3-4 seconds |
The single most common cause of failed runs is stamina exhaustion. When the bar empties you cannot block, dash, or use skills, effectively turning you into a stationary target. If you only remember one rule from this guide, remember this one.
Rewards and Post-Exam Roadmap
Passing Final Selection is the beginning, not the end. Here is what the exam unlocks and where to go next.
| Milestone | Location | Rewards |
|---|---|---|
| Slayer rank | Exam arena exit | Rank progression, new quests |
| Advanced breathing trainers | Map-wide trainer NPCs | Second styles, stronger moves |
| Zapiwara Mountain | Mid-level snowy zone | Move unlocks, mid-game gear, Wen |
| Butterfly Mansion | Story hub | Progression quests, healing restock |
| Demon Territory | High-level zone | Rare moves, large currency payouts |
| Dungeon entrances | Map-marked instanced areas | Exclusive cosmetics and moves |
Final Selection Readiness Checklist:
- Learned first Breathing Style from a trainer
- Katana equipped and moves assigned to hotbar
- Healing items stocked from village shops
- All active codes redeemed for spins and boosts
- Comfortable with block (F), dash (Q), and M1 combos
- Stat points allocated to health and stamina
Once mid-level enemies feel trivial, pivot to world bosses. They drop money, moves, and upgrade materials — and bringing a higher-level friend makes your first clears far smoother.
FAQ
Q: What level should I be for Final Selection in Slayer 2?
There is no single hard number, but you should comfortably clear mid-level enemies around Zapiwara Mountain before attempting the trial. Entering under-leveled with no Breathing Style is the most common reason players fail.
Q: Can I skip Final Selection by becoming a Demon?
Yes. The Demon path is a separate progression track that skips the exam entirely. Demons gain Blood Demon Arts and passive health regeneration but suffer a sunlight weakness and hunger mechanics instead.
Q: Which Breathing Style is best for the Slayer 2 Final Selection?
Thunder Breathing is the strongest pick thanks to Thunderclap and Flash burst mobility, which lets you delete isolated demons and escape swarms. Water Breathing is the best beginner-friendly alternative with dependable dash attacks and finishers.
Q: Do I lose anything if I fail Final Selection?
Failing costs you time and any consumables used during the attempt, but your character, Breathing Style, and levels are untouched. Restock healing items and re-enter once you are ready.